eWCCT Settings
Set your Export ECF<>CSV Key Prefix
Auto Sync on text change
Hide Legacy Execute
The Legacy Execute shouldn't be used anymore, so you can hide it, to save room for important stuff. However, no matter what you set here, if it is still used, it will display for compatible reasons.
Show ID of Dialogue states
eWCCT Keyboard Shortcuts
- Left Mouse Button on a Dialogue/Token in left sidebar = Rearrange it
- CTRL + Left Mouse Button on a Dialogue/Token in left sidebar = Rearrange and Copy it
- CTRL + Left Mouse Button on an Array = Rearrange Variable, Options or Next Block
- CTRL + Left Mouse Button on a Next Input = Jump directly to that Dialogue state
- CTRL + Left Mouse Button on the New Dialogue button = Scroll to the bottom if you have no dialogue selected in the left list.
- CTRL + ALT + C = Show/Hide the Import ECF/CSV | Copy / Paste Object feature. Useful for importing foreign Dialogues into yours | copy pasting e.g. Variables from one dialogue state to another.
- ALT + Left Mouse Button on an ItemHelper Input or CSV Key Helper or on a Dialog state in the left sidebar tree = Copy the Item name to your Clipboard to use it in AddItem(). For the CSV Key Helper you copy the CSV key.
- ALT + CTRL + Left Mouse Button on an Input = Copy the Input CSV string to your Clipboard to use it elsewhere.
- ALT + CTRL + SHIFT + Left Mouse Button on an Input = Copy the Input CSV key + Loc(' ') around it to your Clipboard to use it elsewhere.
- CTRL + S = Exports/Downloads all files in the current open tool.
- ESC = Lose focus of text fields, so the tool can save your changes.
- ALT + SHIFT + S = Save dialog state scroll position.
- CTRL + D = Click on any Execute, Exec, IF or Functions input field to open the Code Editor Extension.
- CTRL + D = Select a word and keep press this hotkey to select and edit all occurencies.
- ALT + Left Mouse Button = Add multiple cursors to select and edit multiple words.
- CTRL + SHIFT + Up/Down Arrow Key = Rearrange current line up or down.
Code Editor Extension (via Pledge)
General Dialogues Knowledge
Once you exported your ECF and CSV Dialogues in eWCCT (e.g. with the hotkey CTRL + S), you have to reload them ingame with the console command ds reload twice. First time for the .ecf file, second time for the .csv file.
Ingame you then set in creative mode or with godmode invisible the Dialogue state to the proper NPC Dialogue block.
If you want to test your Dialogues on a player structure use the godmode fly command.
If you get an error, most of the times it is telling you exactly what went wrong. If it doesn't, use the ds dump command. Type help ds to get more information.
eWCCT Cluster Color Feature
Since the list below can become very long, you can cluster Dialogues visually together by having different background colors. However you have to follow a specific syntax to achieve that, so eWCCT can listen on it.
Syntax: Category_Name_whatever
Example: Mission_BJ_Init
Hint: if you don't like the colors, just press F5 to get new ones.DropOnDeath
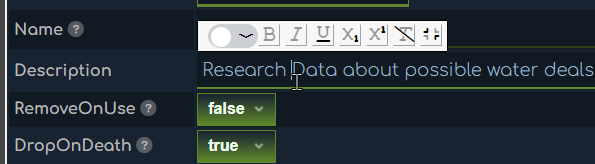
If set to 'False' then this item is not dropped on player death. Use for important story items that players shall not lose on death. Default is set to 'True'.
CSV Key Helper
When working with conditional text variables it's very helpful to directly see what Loc string means what.
- Hold ALT + Left Mouse Button on an ItemHelper Input or CSV Key Helper or on a Dialog state in the left sidebar tree = Copy the Item name to your Clipboard to use it in AddItem(). For the CSV Key Helper you copy the CSV key.
- Hold ALT + Hold CTRL + Left Mouse Button on an Input = Copy the Input CSV string to your Clipboard to use it elsewhere.
- Hold ALT + Hold CTRL + Hold SHIFT + Left Mouse Button on an Input = Copy the Input CSV key + Loc(' ') around it to your Clipboard to use it elsewhere.
MarketPrice
Sets the Market price of a custom Token. That can then be used in the NPCTraderConfig.ecf.
Name for Dialogues
Set the name of the Dialogue. This needs to be set with godmode invisible or in a Creative game ingame by pressing F on the NPC entity.
Use NO spaces. Use camelcase or underscore or minus as separator.Name for Token
Set the name of the Token. It can be colorful but no breakline.
NPCName
Use 'NPCName' to override or change the default entity/blockname in the dialogue header element; Needs to be set in the FIRST element of the dialogue!
Comment
With eWCCT v3.0.0 you can now export and import comments into eWCCT.
Only condition for importing comments is that they start with "#:" and are wrapped
in " ".
Example:
#: "This is a comment"
Only then eWCCT can assign it to the proper field. Sometimes I found it useful to describe a dialogue / token state in terms of meta data so I can find it later back again (where did I set the Dialogue / Token state, in what POI, what playfield, etc.)
RemoveOnUse
If true, the game removes the Token once it's used. For example on a door.
CSV Key Helper
How to use:
- 1. Copy an existent csv key.
- 2. ⚠ IMPORTANT Clear (CTRL + A + keep holding CTRL + DEL) the csv key where you want to paste your 1. key in. If the csv key field is empty continue with Step 3.
- 3. ⚠ IMPORTANT Press ESC or wait ~3 seconds.
- 4. Paste your 1. key in the csv key you just cleared (if there was any text).
- 5. ⚠ IMPORTANT If you turned off Auto Sync in your settings, press ESC if you want to sync all CSV keys.
Shortcuts
- Press ALT after selecting a CSV Key Helper Input field = Copy the CSV key to your Clipboard to use it elsewhere.
- Hold first CTRL then ALT then release after selecting a CSV Key Helper Input field = Copy the CSV key wrapped by Loc to your Clipboard to use it elsewhere.
- Hold first SHIFT then CTRL then ALT then release after selecting a CSV Key Helper Input field = Copy the CSV key wrapped by LocF to your Clipboard to use it elsewhere.
Custom Icon
It is possible to set your own custom Icons for Tokens!
- Create a folder in your Scenario/SharedData/Content/Bundles/ItemIcons
- Put your .png icon of your Token inside
- Upload it here in eWCCT
Note: ONLY .png files work!
Note: You have to relog / restart your savegame to apply the changes.
Note: You have to re-import all images in eWCCT every time you clear your Localstorage. After that they stay even if you close your browser.
Token Id
The Token Id is the Lock Code ingame. It can be a number from 1 to 9999.
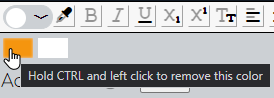
Custom Color Picker
- You have to select a text to be able to color it.
- Select a color and press Enter to add it in the quick slot.
- Up to 72 colors possible to store.
- If you try to add more than 72 colors, the first color will be removed and the new color added at the end.
- Colors are shared within all Empyrion Web (eW) tools. (eWCCT, eWPDA, eWSSC)
- Note: Hold CTRL while left click on a color to remove it.
Output / Text
Use to let the NPC/Questgiver talk to the player
You can output variables in brackets like so {PlayerName}.
You can use @"type""time" to specialize your Dialogue Output even more.
"type" can be:
- 'w' = wait + time => unit is 1/2 seconds, so wait times from 0.5 to 4.5 seconds are possible
- 'p' = paging + time => see type w. If @p9 is used, the dialogue waits for user RMB or Button Click to continue.
- 'd' = delay per word => delay-per-word until the next 'd' or the end of the current page. 0 = show words without a delay. 1..9 = unit is 2/100 seconds, added to the base delay of 0.04 sec per word. Default is '3' for 10 words/sec, range is from 4.5 to almost 17 words/sec
- 'q' = quit + 0 => if used, a player can't close the Dialogue with ESC or the Close button anymore.
Example: @q0 Hello @w2 Player. @p2 @d0 Come back soon. -> This will insert a 1 second pause between Hello and Player and display "Come back soon." on another page after 1 second. "Come back soon" will be displayed instantly then. This Dialogue can't be closed by the player manually anymore.
Input
You can show a dialog for inputting integer, float or text from players. Text strings can be up to a length of 30 characters for now. For more info check out the Dialogues-config-and-examples.txt file.
Type
Type for the Input property. int, float or string is allowed.
Label
What text should be shown as label for the input popup.
OkButton
Positive Button text can be set here. Default (if you leave it empty) is "Ok".
CancelButton
Negative Button text can be set here. Default (if you leave it empty) is "Cancel".
Note: OkButton must be filled.
Option Next
Use for dialogues where the user makes a choices (both work in conjunction)
Barking State
Set a Barking State, where the Output text will be displayed for the NPC as soon as the player moves his cursor on it. Options and Next States will be ignored in the Barking text popup.
Option/Next - param1
Here you can set an existent State, where the Dialogue should return to, if you used the Return statement
elsewhere.
Or use GotoAndReset to simulate a close and open state mechanic. That way you don't need
to inherit the variables of the next state.
Variable - param2
Here you can decide if the given dbplayerX variable should be stored with the players entity id or steam id. In MP storing the steam id is helpful to prevent players from farming Quests (rewards) multiple time via the cb:reset command - because the player gets a new entity id everytime he does cb:reset. Default is nothing=entityid.
Executes
The difference between Executes and Execute is that Execute should be seen as obsolete. Executes does the same but each line is basically a separate Execute.
If you are familiar with C# / API Modding syntax, you can use the Executes to have access to core game
functions.
In the Example below a LCD named "MyLCD" would be considered by the Execute state and a "Hello
World!" printed on it. Example:
-
Execute: "ILcd lcd = LocalStructure?.GetDevice<ILcd>('MyLCD'); lcd?.SetText('Hello World!');"
Note: you can chain Execute statements by just pressing Enter (new line will be automatically exported correctly with a \n).
Note: if you want to include Dialogue variables in the Editor use the syntax '' + variable. Example: SetText('' + PlayerName);
Note: for all the Execute properties go here
Item Helper
This field is actually not relevant for the Dialogues or the game. It's just a helper from eWCCT to search for items you want to use in combination with AddItems in a NextIf condition for example.
Usage: search for an item, select it or press enter and then press and hold the ALT key + left mouse button to copy it to your clipboard.
Note: you have to import the Config_Example.ecf or BlocksConfig.ecf or ItemsConfig.ecf from the Configuration folder: C:\Program Files (x86)\Steam\steamapps\common\Empyrion - Galactic Survival\Content\Configuration or C:\Program Files (x86)\Steam\steamapps\common\Empyrion - Galactic Survival\Content\Scenarios\YOURSCENARIO\Content\Configuration
Functions
With some C# programming knowledge you can create here specific best case solutions for your Stories or Quests. Useful in combination with the CallLater(seconds,function) feature.
Hint: use UnityEngine.Debug.Log() to output your stuff in the ingame console.
Note: for all properties go here
Globals
Globals or constants can be used in an empty Dialogue state. Usable in ALL Dialogue states afterwards,
without the need to declare them as variable.
- You can use more than 30 Variables that way
- You CAN NOT work with them and rewrite them with new values. They are read-only!
- Example:
int LotteryNumber = 7;
Val / Execute
An exec Function is called when Option If conditions are met.
Notice about CDATA: CDATA is an useful utility when writing native C#. There you can
use double quotes as exceptions. However make SURE to wrap your code with <CDATA> </CDATA>
and
only use it in Executes!
Value (for Next, Variable or Exectue)
Next
If the Next If condition is met continue with a specific Dialogue (you can also use "End" to close the Dialogue). Limit: 30
Use for automatically advancing dialogues (based on the IF condition)(both work in conjunction)
Note: to negate an expression you have to set a ! in front. For example "!IsSignalSet('mySignal') will ask if this Signal is NOT set.
Note: param1 allows you to set Sub jump routine, so you can use Return states as value then.
Variable
Define a variable as val. For example "int dayCounter". This means a variable is declared which contains or will contain integer numbers. Limit: 30 Variables.
Option
Options are dialogue options the player can click on / interact with. Limit: 12
Functions and Helpers
Functions are an advanced programming feature, that allows you to create specific desired results.
- GetItems() - returns a list with all player items, f.e. use it like that
foreach (DialogueSystem.ItemInfo itemInfo in GetItems()) {if (itemInfo.Name == 'Token') return true;
}
Full ItemInfo parameters:
				public struct ItemInfo {

					public string Name;
					public int Id;
					public int Count;
					public int Meta;

				}
Helper functions:
- IsInputOk() - used in the Input property. Returns true if the player pressed the Ok button.
- IsInputCancel() - used in the Input property. Returns true if the player pressed the Cancel button.
- InputResultAsInt(), InputResultAsFloat(), InputResultAsString() - used in the Input property. Returns the player input already converted into the correct type.
- Random(x,y) - it shuffles a number x up to number y.
- CallLater(TimeInSeconds,FunctionName) - it executes your FunctionName at a given TimeInSeconds. Do NOT over-use it!!Example: Execute:
					counter = 11;
					CallLater(1,countdown);
Function:
					int counter;
					void countdown() {
					ILcd lcd = LocalStructure?.GetDevice<ILcd>('lcd');
					 counter = counter - 1;
					 if (counter > 0) {
					  CallLater(1,countdown);
					 }
					 lcd.SetText('' + counter);
					}
IContainer container = OpenDevice;
VectorInt3 blockPos = OpenDevicePos;
Hybrid Functions (Properties for the Dialogue System in the BlocksConfig.ecf):
- ExecuteOnActivate - Adding a dialogue state from the dialogues.ecf will allow the
block/device to activate that dialogue by facing the block and clicking F;
Note: Does not require 'IsActivatable' or other properties; Note: If device already has 'IsActivatable' or other activatable-state/Access (F-button, like containers, levers etc) their Access-function will be executed primarily BUT the dialogue will be run (invisible) never the less! - ExecuteOnCollide - Adding a dialogue state from the dialogues.ecf will allow the block/device to activate that dialogue by touching/pressing against that block. (similar to ExecuteOnActivate!)
- DialogueSingleUserAccess - Set this to true in the BlocksConfig.ecf to so only one player at a time can access the dialogue triggered by the device/blocks
- DialogueState - to be used in blocks of class "NPCDialogue" to allow specifying a hard coded target dialog. If this is present, this block can be placed by users on player bases and be also triggered using "F".
Local variables available are:
- int, bool, string, float
- Special case for string: Put it in single quotes ''. You can declare Dialog States as variable, to be able to jump to them. For example set "JumpState" as string, declare it with "JumpState = 'YourTargetState'" and in the proper place you go to that state with calling it with "@JumpState".
- dbstate_string: same as dbstate_int but holds a string. Max. 125 characters.
- dbplayer_string: same as dbplayer_int but holds a string. Max. 125 characters.
- dbglobal_string: same as dbglobal_int but holds a string. Use AddToGlobalVar() or SetGlobalVar() to change it. Max. 125 characters.
- dbglobalpoi_string: same as dbglobalpoi_int but holds a string. Use SetGlobalVar() to change it. Max. 125 characters.
- dbstate_int: this var holds the same amount for this player for the current start state
- dbplayer_int: this var holds the same amount for this player in all dialogues
- dbplayerpf_int: this var holds the same amount for this player in all dialogues and only on the same playfield it got initiated and used.
- dbplayerpoi_int: this var holds the same value for each player only within the current POI.
- dbplayerpoipos_int: that can be used f.e. on traders in a POI and it will preserve its value even after the POI did regenerate.
- dbglobal_int: this var can be accessed across all dialogs and players
- dbglobalpf_int: this var can be accessed over all dialogs and players within a playfield (global in a playfield var). use AddToGlobalPfVar() or SetGlobalPfVar() to change it.
- dbglobalpoi_int: this var can be accessed over all dialogs and players within a playfield (global in a playfield var). use AddToGlobalPoiVar() or SetGlobalPoiVar() to change it.
Exectue
Execute a specific val. For example AddItem('itemName',Count)
Note: you can chain Executables with a semikolon.
Note: Do not use the default Execute anymore for State executions. Use the ExecuteEditor instead.
Examples:
- UnlockTechTreeItem('string blockOrItemName')
Unlocks the specified tech tree item or block. Returns true/false according to success. If you specify now -1 as UnlockCost, the item can only be unlocked with this function!. - IsTechTreeItemUnlocked('string blockOrItemName') (bool)
Returns if the specified item/block is already unlocked - GetReputation(Faction.Talon) < Reputation.FriendlyMin
use > or < or <= or >= ; Also works with NeutralMin etc - GetReputation(Faction.Talon) < 24000
use > or < or <= or >= ; Steps: 0-6000 = Hostile, 6001-12000 = Undfriendly, 12001-18000 = Neutral, 18001-24000 = Friendly, 24001 = Honored - AddReputation(Faction.Zirax, -100)
Adds amount of reputation points - HasItem('KeyCardBlack', 3, 1234)
item name, count, (meta optional) - AddItemsFromContainer(int containerId, int maxItemCount)
Giving a player reward items that are specified in Containers.ecf - AddItem('GoldCoins', 2*GoldCoinsPlayerBet)
item name, count, (meta optional) - RemoveItem('KeyCardBlack', 3, 1234)
item name, count, (meta optional) - SetBlockActive('BlockName', true/false)
Set given Block on/off (on or off = true or false) - IsBlockActive('BlockName') (bool)
Check if given Block is on/off (on or off = true or false) - SetSignal('SignalName', true/false)
signal name and status (on or off = true or false) - IsSignalSet('SignalName') (bool)
signal name, returns status (see above) - IsPdaChapterActive('ChapterTitleYamlKey') (bool)
use chapter yaml title key which is set in the PDA.yaml (not the localized title text). Use CTRL + ALT + D in eWCCT. - IsPdaTaskActive('ChapterTitleYamlKey', 'TaskTitleYamlKey') (bool)
use chapter yaml title key and task yaml title key which is set in the PDA.yaml (not the localized title text). Use CTRL + ALT + D in eWCCT. - AddBookmark('Test Name', 2, 'Jite Pi', 4000, 5000, 6000)
AddBookmark(name, type, target playfield name, posx, posy, posz) type: 0 = Solar System, 1 = Galaxy Map, 2 = space, 3 = planet - GetGameTimeInSec() (int)
returns the time in seconds since the game was started - DeltaTimeToString(gametime) (string)
formats a time intervall to f.e. 1.2 days or 0.7 h -
AddToGlobalVar('VarName', increment) (int)
global vars should only be changed with this call. and only increments (+/- values) can be used to avoid any multi user conflicts. Use in combination with dbglobal_int parameter. -
AddToGlobalPfVar('VarName', increment) (int)
global vars should only be changed with this call. and only increments (+/- values) can be used to avoid any multi user conflicts. Use in combination with dbglobalpf_int parameter. -
AddToGlobalPoiVar('VarName', increment) (int)
global vars should only be changed with this call. and only increments (+/- values) can be used to avoid any multi user conflicts. Use in combination with dbglobalpoi_int parameter. -
SetGlobalVar('VarName', val) (int)
set the value of a global vars. attention: another player can also call this function and overwrite any changes. Use in combination with dbglobal_int parameter. -
SetGlobalPfVar('VarName', val) (int)
set the value of a global vars. attention: another player can also call this function and overwrite any changes. Use in combination with dbglobalpf_int parameter. -
SetGlobalPoiVar('VarName', val) (int, string)
set the value of a global vars. attention: another player can also call this function and overwrite any changes. Use in combination with dbglobalpoi_int or dbglobalpoi_string parameter. -
GetInstanceTicket() or int GetInstanceTicket('playfield name') (int)
returns the index number of the current instance or 0 if no instance is active. -
OpenTraderWindow()
Opens the Trader Window from the Trader Block you defined the Dialogue state. -
OpenHtmlWindow(string title, string url, float horizontalePerc, float verticalPerc, float
widthPerc, float heightPerc, bool _bShowNavButtons, _bgColor: null,_bBlockBG: false)
(void)
Opens the given url in the ingame web browser.
Example
OpenHtmlWindow('YourTrailer', 'www.google.de', 0.12f,0.156f,0.76f,0.77f, _bShowNavButtons:false, _bgColor: new Color(1.0f,0.0f,0.0f,1.0f),_bBlockBG: false); OpenHtmlWindow(string title, string url, float horizontalePerc, float verticalPerc, float widthPerc, float heightPerc, bool bShowNavButtons, Color? bgColor = null)
OpenHtmlWindow('YourTrailer', 'https://www.youtube.com/embed/xyz1234lasi73?rel=0&autoplay=1', 0.26f,
                0.34f, 0.48f, 0.21f, _bShowNavButtons:false, _bgColor: new Color(1.0f,0.0f,0.0f,1.0f))"
Use %SHARED_DATA% to use local content to display (root/Content/Scenarios/YOUR_Scenario/.
Example
%SHARED_DATA%/Content/Prefabs/test.png',0.1885f,0.2125f,0.6235f,0.49f,_bShowNavButtons:false,_bBlockBG:false,_bgColor: new Color(0.05f,0.09f,0.11f,0.9f));
Use %CONTENT_DIR% to use local content to display (root/Content).
Example
OpenHtmlWindow('','%CONTENT_DIR%/test.png',0.1885f,0.2125f,0.6235f,0.49f,_bShowNavButtons:false,_bBlockBG:false,_bgColor:
                new Color(0.05f,0.09f,0.11f,0.9f));
rel=0 will make it so the videos recommended at the end are only from that youtube channel so players won't get random videos linked at the end.
autoplay=1 is supposed to autoplay the video but it does not work (yet). Players still have to click the youtube play button.
Add controls=0 to disable the on-screen youtube controls for a more immersive cinematics. To maintain mouse control while the video is playing, make sure that the dialog window is still active (don't play the video on an option end state for example).
Remember when videos are hosted on webservices like Youtube, videos may have ads. Those are beyond the control of the channel or player. You can probably use your own web host and create a more immersive experience for your // custom scenarios or server cinematics!
float heightPerc // The 1f, 1f controls the size of the window that is opened. 0.75f, 0.75f if you want a smaller window for example.
float widthPerc // The 1f, 1f controls the size of the window that is opened. 0.75f, 0.75f if you want a smaller window for example.
float horizontalePerc // controls the position of the HTML windows on the dialogue window
float verticalPerc // controls the position of the HTML windows on the dialogue window
bool _bShowNavButtons // true/false: shows or hides the navigation buttons
color _bgColor // _bgColor: new Color(1.0f,0.0f,0.0f,1.0f) "the 4th component is the alpha value: 0 = transparent, 1 = opaque"
bool _bBlockBG // true/false: Blocks/Unblocks the dialogue buttons -
CloseHtmlWindow() (void)
Closes the current open HTML Window. -
Loc(string key) (string)
localizes dynamically the given key from the supplied loca csv or the internal loca table. Useful in combination with the Execute Editor. -
LocF(string key, variable1, variable2, ...) (string)
localizes dynamically the given key from the supplied loca csv or the internal loca table and supply a variable to the string itself. In the CSV you can access it via {0}, {1}, ... -
IsFactionDiscovered(Faction.Name)
(replace Name with your desired Faction from the Factions.ecf) (bool)
returns true if the specified faction is discovered by the local player, else false -
SetNPCName('name') (string)
allow changing the title of the dialogue window during a running dialogue -
Other States that can be used (w. examples)
- PlayerName
name of the local player. Can be used in the CSV with {PlayerName}. - PlayersInPlayfield
number of players in current playfield -
Player.Stamina = 100
Check for player stats - Player.Health -= 1
Check for player stats - Player.Oxygen = 30
Check for player stats - Player.Food += 1
Check for player stats - Player.Credit += 1.1
player credits on his bank account (NOT the moneycard!) - Player.Origin == 0
For player origins. Requires the ID of the Origin as set in the sectors.yaml - Player.ExperiencePoints += 1
Sets or gets the player's XP - Player.Level
Gets the current level of the player (you can only change the level by changing the ExperiencePoints) - Player.UpgradePoints += 1
Sets or gets the player's Upgrade/UnlockPoints - Player.Name
Gets the player's name. Can be stored in a string. - Player.Id
Gets the player's steam id. Must be stored in a string. - Player.EntityId
Gets the player's internal game id. Can not be stored in a string. - Player.PlayfieldName
Output the playfield name the player is currently in. - Player.Skills['name'] (float)
Sets or gets a specific name variable from a different database table to use it for players.
Example: Player.Skills['Rhetoric'] = 5 would set a Rhetoric variable to 5.0 (float). With Player.Skills['Rhetoric'] you would get the value 5.0 back.
The skill values can be used to modify properties of blocks and items: Damage, BlastDamage, BulletSpread, ReloadDelay, Recoil, RangeAU und RangeLY
Add to block/item config like this:
Mod.ReloadDelay: "ReloadDelay + Player.Skill['skillname']"
If you want a different form of "documentation" go to Content/Configuration/Dialogues-config-and-examples.txt
eWCCT - Donation
Hey Creators!
Thanks for using my tool - I hope it helps you as much as it helps me, creating great content for
Empyrion.
This tool is online since 1+ years, 24/7 and helped not only my HWS Servers but also Project/Reforged
Eden and even Eleon themselves for creating Vanilla content.
I think it's safe to say that creating Dialogue, Token and Localization content without eWCCT is like
trying to chop a tree with a blunt knife.
However, while it's free and easy for you to use, it's quite a challenge for me to maintain it, support
it and implementing whatever new feature might come.
This is where you come into play. To keep eWCCT public and free for everyone, I would ask for a donation
from time to time to at least cover the web server costs this tool is running at.
But to make it even more lucrative for you, I came up with a pledge system. You can either send me a
feature request or I come up with features from time to time that could improve the tool. Once the
pledge goal is reached the feature will go live!
Thanks in advance and enjoy eWCCT.
If there is no pledge option available or you just want to support this way
eWCCT Pledge Options
Delete all of your scroll positions
After some hours of work in eWCCT and setting bookmarks you might want to clear all of them again.
That's done with one click instead of fiddling yourself in the Dev Tools around.
It took me 10 minutes to implement and test.
0€ raised
Goal: 5€
Filter for Translation words in Loca Tool
You want to know what loca key is related to the item you hover over ingame? For example ingame it's
called "Cargo Box" but the loca key for it is ContainerMS01Large. Confusing and time consuming to
find,
right? With this pledge it's easy peasy (check the video above)
Bonus: with ALT + LMB you can copy the loca key in the left sidebar like you can
for
Dialogues and Tokens.
It took me 6 hours to implement and test.
0€ raised
Goal: 180€
Dialogue Bookmarks
Filters are great but jumping back and forth between states can be very time consuming and annoying.
With this pledge you have your bookmarked dialogue states always in the list. More time for creating
content!
It took me 6 hours to implement and test.
0€ raised
Goal: 180€
Code Editor Extension

Who those who work a lot with Executes and Functions this is a dream pledge. Finally you have full
C#
syntax color support, multiple cursor editing, brackets highlighting and more. All shortcuts will be
listed in the shortcut overview panel.
It took me 4 hours to implement and test.
0€ raised
Goal: 120€
Token Image Chooser / Gallery

The previous image handling wasn't convenient on re-import and usability. With this pledge you have
a much faster and smoother experience. Open the gallery, click on an image, it's stored in your
clipboard and then paste it in the image field.
Bonus: you get a dedicated clear Token image database button on the Info page, so
you don't have to wipe your whole database.
It took me 1 hour to implement and test.
0€ raised
Goal: 30€
Inline Documentation
For even faster quest creation you can have an inline documentation open all the time.
It took me 3 hours to implement and test.
0€ raised
Goal: 90€
Create Loca CSV key / Delete Loca CSV key
Since more and more people using the Loca Tool, it was time to create more conveniences. Something I
couldn't do at the beginning, cause it was a bit complicated to program. You can now add and delete
CSV
keys within eWCCT.
It took me 5 hours to implement and test. 50% off due user request.
0€ raised
Goal: 90€
Collapse / Expand Sidebar
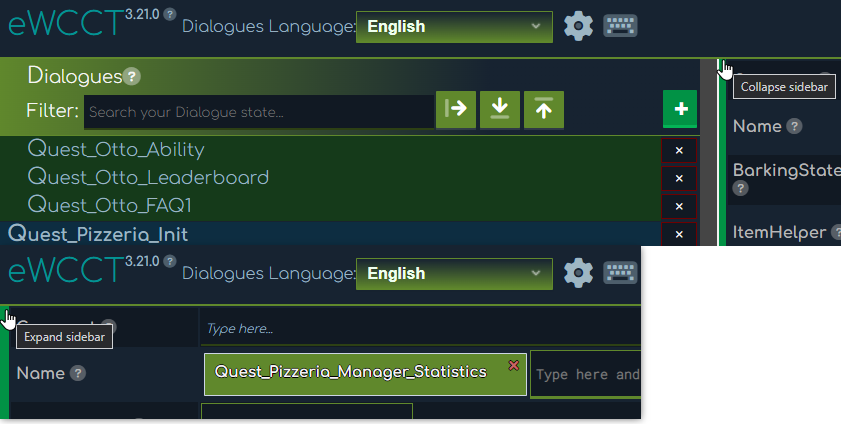
In case you want to concentrate on your dialogue logic and don't have the sidebar in view, you can
collapse it.
It took me 30 minutes to implement and test. 50% off due user request.
0€ raised
Goal: 4€
Import foreign Dialogues
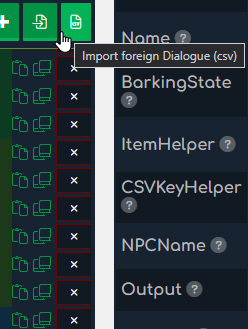
Do you ever wanted to import a specific dialogue from another Scenario to yours? The workflow is
quite a challenge and fiddling around with the Dialogues.ecf and Dialogues.csv files. With this big
feature, it's 4 button clicks.
It took me 10 hours to implement and test.
300€ raised! ✅ Implemented
Goal: 300€
Copy / Paste Objects
Did you ever have the case to copy paste just Variables from one dialogue state to another? Or
Options? Or Next states?
I bet!
New: You can now not only copy/paste all objects (green plus) but have also an
additive
paste option when holding CTRL on paste.
It took me 5 hours to implement and test.
150€ raised! ✅ Implemented
Goal: 150€
Show Dialogue State ID

Sometimes numbers are easier to remember than names, right. With this optional setting you can
display
them and search / filter for them.
It took me 1 hours to implement and test. 50% off due user request.
15€ raised! ✅ Implemented
Goal: 15€
Add new Dialogue under the current dialogue
Thanks for the request to certain users - I found it also inconvenient, so here we are. If you
select a dialogue in the left list and then just click the green Add Dialogue button and then change
the name of it, it will be put under your current active dialogue. That way you don't need to
duplicate dialogues all the time or do filter workarounds. If you CTRL + click on the green Add
Dialogue button you have still the scroll to bottom behavior if needed.
It took me 16 minutes to implement and test. 50% off due user request.
4€ raised! ✅ Implemented
Goal: 4€
Better visual sidebar grouping
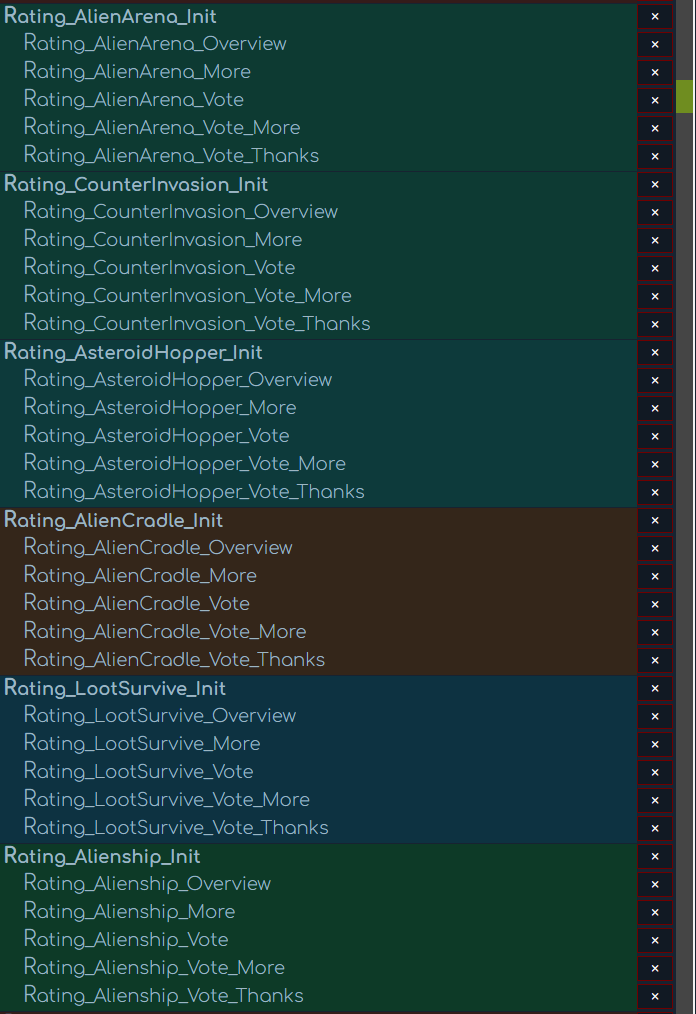
Thanks for the request - with this and the name convention to start your dialogues with _Init, it's
better to see groups at first sight.
It took me 10 minutes to implement and test. 50% off due user request.
3€ raised! ✅ Implemented
Goal: 3€
Display Option and Next Count
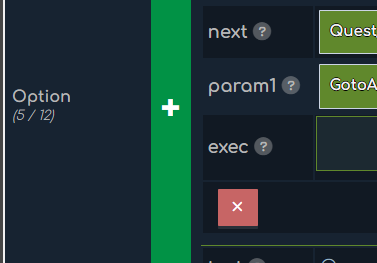
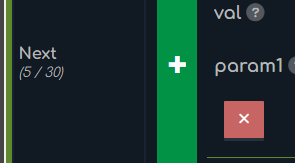
Thanks for the request - with this you have the limit of 12 Options quickly at sight.
It took me 5 minutes to implement and test. 50% off due user request.
1€ raised! ✅ Implemented
Goal: 1€
Text Editor Buttons facelift
Do you want nicer buttons for the Token and Loca Text Editor? I can do this easy but the money would
help me a lot to keep all those icons alive. See here:
Icons cost money too.
It took me 5 minutes to implement and test.
3€ raised! ✅ Implemented
Goal: 3€
Setting to hide Legacy Execute
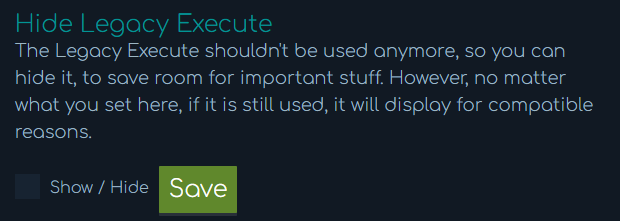
To have more room for important stuff: hide the legacy execute field.
It took me 30 minutes to implement and test. 50% off due user request.
8€ raised! ✅ Implemented
Goal: 8€
Import Color to your Palette (Colorpicker)
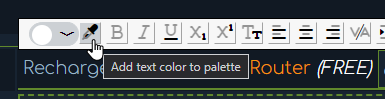
If you import a dialogue csv or Token or Loca.csv you might find colors you want to use, because you
don't have it in your own colorpalette (or you deleted your colorpalette). To get them in, it was
quite a burden.
Now, it's one click!
Bonus: you get the option to delete single colors!
It took me 3 hours to implement and test.
45€ raised! ✅ Implemented
Goal: 45€
New Release of eWCCT 3.58.0! 🎉
Hi Creators - RexXxuS here,
Thanks to a secret hero, the big Import / Export foreign Dialogue feature is now available!
Changelog
Do you like the tool? Does it help you to realize your ideas and stories?
Please consider supporting eWCCT, so I can continue updating it
eWCCT
Welcome to eWCCT - Empyrion Web Content Creator Tool
Choose your Tool
Here you can create and change Dialogues for your NPCs. You can create immersive Story tellers or even mini games with a bit of logic.
To configure specific Tokens for specific Doors or Container you need this Tool.
Manage your Localization.csv file for fast and easy adding/changing of your keys.
eWCCT
Welcome to eWCCT - Empyrion Web Content Creator Tool
Start fresh?
If you don't want to import any Dialogues files and start from scratch, just click on the left green + to create a new Dialogue and with that a new Dialogue journey.
Import?
If you want to import your Dialogues files, go to the
Make sure to also import your BlocksConfig.ecf and ItemsConfig.ecf for proper item suggestions and more. You can basically import your whole Scenario folder and eWCCT handels the rest
Done with all of that? Select a chapter in the left Chapter Tree. Have fun!
eWCCT
Welcome to eWCCT - Empyrion Web Content Creator Tool
Import?
If you want to import your Localization.csv file, go to the
eWCCT
Welcome to eWCCT - Empyrion Web Content Creator Tool
Start fresh?
If you don't want to import any TokenConfig file and start from scratch, just click on the left green + to create a new TokenConfig and with that a new Token journey.
Import?
If you want to import your TokenConfig file, go to the