eWPDA Settings
Set your Export YAML<>CSV Key Prefix
Auto Sync on text change
eWPDA Keyboard Shortcuts
- Hold Left Mouse Button on a Chapter/Task/Action in left sidebar = Rearrange it
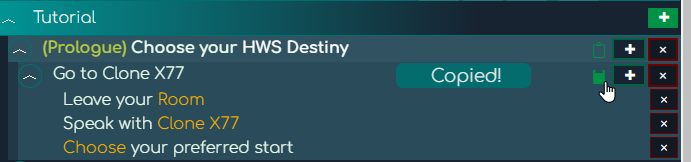
- CTRL + Left Mouse Button on a Chapter/Task/Action in left sidebar = Rearrange and Copy it
- CTRL + ALT + D = Show/Hide the Chapter / Task Title ID feature. Useful for Dialogues "IsPdaChapterActive" and "IsPdaTaskActive".
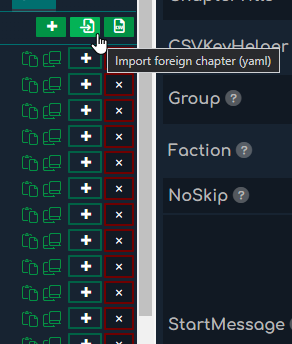
- CTRL + ALT + C = Show/Hide the Import YAML/CSV feature. Useful for importing foreign Chapters into yours.
- ALT + CTRL + Left Mouse Button on an Input = Copy the Input CSV key to your Clipboard to use it elsewhere.
- ALT + Left Mouse Button on an Input = Copy only the key to your Clipboard to use it elsewhere. For example RewardedChapters or Items.
- Hover over left sidebar chapter = See the Chapter ID and full name. Useful for ingame clearing chapters
- CTRL + S = Exports/Downloads the PDA.yaml and PDA.csv at the same time.
- ESC = Lose focus of text fields, so the tool can save your changes and/or update data properly.
Preamble
If this has content, a Briefing-Intro is shown. Leave empty if you do not want to use an intro-briefing box (f.ex for Chapters that activate in a row and do not nee a ""info bridge"" other than the complete message) If DESCRIPTION is NOT empty, its content will be used as an ALTERNATIVE mission intro (only message window, no briefing-page)
Additional Info
- Preamble/No Description: Show the 'old' briefing window with the Preamble text
- No Preamble/Description: Show the 'mini' briefing window with the Description text
- No Preamble/No Description: Show the 'mini' briefing window with a default message containing the chapter title
- Preamble & Description: Show the 'old' briefing window with the Preamble text and the Description text if provided
Picture File
It is possible to set your own custom Images for your Chapters and Tasks - and they are synced in MP!
- Create a folder in your Scenario/SharedData/Content/Extras/PDA
- Put your .jpg or .png images inside
- Upload it here in eWPDA
Note: .jpg and .png files are allowed.
Note: You have to relog / restart your savegame to apply the changes.
Note: You have to re-import all images in eWPDA every time you clear your database. After that they stay even if you close your browser.
Note: If you want to remove a PDA image, you have to remove the image filename string and press ESC to refresh it. Same if you added an image.
Chapter Description
General note: You can insert images only to Descriptions (Chapter or Action) with {image.jpg}. Those images must be in the proper PDA folder located.
If PREAMBLE is NOT used, this text will be displayed as a mission starter! NoSkip applies!
Additional Info
- Preamble/No Description: Show the 'old' briefing window with the Preamble text
- No Preamble/Description: Show the 'mini' briefing window with the Description text
- No Preamble/No Description: Show the 'mini' briefing window with a default message containing the chapter title
- Preamble & Description: Show the 'old' briefing window with the Preamble text and the Description text if provided
Action Description
If you have a red border around your Action Description makes sure to type text in it or just update something in your text to retrigger the sync.
Rewards | Item or Type
All items/Devices can be used with ITEM. Mission Container (DropBox), XP, UP, LevelIncrease and LevelTarget can be used with TYPE Reputation and ReputationTarget need to be used with TYPE
Note: do not use a negative count to remove items or the amount. This is currently only semi working.
NoSkip
With "TRUE" you can remove the "SKIP" button from the Chapter Start screen. The player only has the choice to accept the mission.
ATTENTION: NoSkip False only proper works if you do NOT set any Preamble.
ChapterActivation
If used on ChapterActivation it replaces the old "Auto" mechanism, if used in combination with a text.
HideTasks
Hides Tasks in the Mission Briefing (when PREAMBLE is used)
CSV Key Helper
For the Group Property you must have the same PDA.yaml CSV key for multiple strings!
How to use:
- 1. Copy an existent yaml csv key.
- 2. ⚠ IMPORTANT Clear (CTRL + A + keep holding CTRL + DEL) the yaml csv key where you want to paste your 1. key in. If the csv key field is empty continue with Step 3.
- 3. ⚠ IMPORTANT Press ESC or wait ~3 seconds.
- 4. Paste your 1. key in the yaml csv key you just cleared (if there was any text).
- 5. ⚠ IMPORTANT If you turned off Auto Sync in your settings, press ESC if you want to sync all CSV keys.
- Press ALT after selecting a CSV Key Helper Input field = Copy the CSV key to your Clipboard to use it elsewhere.
Group
Here you can define your custom group, which will then displayed in the game. That chapter is then put into this group. Helps greatly with organizing a lot of chapters. If you leave Group empty but have a Faction set below, the Group will get the name of the Faction you have set. If Group and Faction is empty the game will make a default "---" out of it and put that chapter into it.
Note: the Category ZiraxMission, PolarisMission and TalonMission are obsolete
and should not be used anymore! They will be removed from eWPDA.
Note: make sure your Groups are ordered in cluster together. If you have for
example two chapter in one group but they are not together grouped in the list, they will be
displayed twice in the list in the game.
Faction
Select or set here a NPC Faction from the Factions.ecf file. See the documentation about Group - Faction handling. If a faction is set, this will be taken for Visibility/Activatable ByReputation or Reward.
PlayerLevel
Defines Level for "Activatable" and "Visibility"
Activatable
- ByLevel = only possible to start if player has reached the level defined in PlayerLevel.
- ByCredits = only possible to start if player has given credits in his Player Balance.
- ByReputation = only possible to start if Reputation with a faction is met (Requires: REPUTATIONLEVEL).
- WhenRewarded = start this chapter if the chapter marked with ""RewardChapters"" is completed. Also visible in the PDA overview below ""Rewards"".
- PdaReferral = visible via tag in playfield.yaml.
- Never = use, for example, for 'Activatable' with ChapterActivation to never allow manual activation via UI by player
Visibility
- ByLevel = only visible in list if player has reached the level defined in PlayerLevel.
- ByCredits = only visible in list if player has given credits in his Player Balance.
- ByReputation = Shows when Reputation with a faction is met (Requires: REPUTATIONLEVEL).
- WhenRewarded = start this chapter if the chapter marked with ""RewardChapters"" is completed. Also visible in the PDA overview below ""Rewards"".
- PdaReferral = visible via tag in playfield.yaml.
- Never = use, for example, for 'Activatable' with ChapterActivation to never allow manual activation via UI by player
- WhenChecked = use with ChapterActivation-managed chapters where chapter should be hidden as long as no activation condition is ok
- WhileCompleted = while the Check matches, it is visible. Only use for Visibility.
Amount
Amount is used basically on 2 situations
- Things you need to collect or kill. For example SubjectKilled.
- Or in the WaitAction Check. The countdown is then displayed on the right HUD dynamically.
Playfields
Used as an additional "IF" condition in terms of Visibility. Note that it is an "AND" logic.
Example: you have set "Always" in Visibility but "Akua" in Playfields mean, that the Chapter is only visible if you are in Akua.
PopupActivatesChapter
Popup means in this context the dependency of Display: Bottom Middle Blue or Red. It does NOT work together with Center Middle Prompt!
It basically allows you to create a silent notification for the player, that he can activate the Chapter by himself by pressing F1.
DialogStartState
Select a 'Dialogue Name:' entry from your Dialogues.ecf. This Dialog will then be opened as "Message" type..
DialogEndState (Optional)
Select a "Dialog Name" from your Dialogues.ecf, that the PDA listens to. NOTE: it HAS to be the LAST Dialogue state where OPTIONS are available. The option the player selects here will then be processed in the DialogOption field.
NOTE: this is mandatory if you are using DialogStartState for StartMessages for a ChapterActivation!!
CSV Key Helper
When working with csv keys it's very helpful to directly see what the key stands for.
- ALT + CTRL + Left Mouse Button on an Input = Copy the Input CSV key to your Clipboard to use it elsewhere.
- ALT + Left Mouse Button on an Input = Copy the everything inside the input to your Clipboard to use it elsewhere. For example RewardedChapters or Items.
- Press ALT after selecting a CSV Key Helper Input field = Copy the CSV key to your Clipboard to use it elsewhere.
Custom Color Picker
- You have to select a text to be able to color it.
- Select a color and press Enter to add it in the quick slot and color your selected text.
- Up to 72 colors possible to store.
- If you try to add more than 72 colors, the first color will be removed and the new color added at the end.
- Colors are shared within all tools. (eWCCT, eWPDA, eWSSC)
DialogOption (Optional but dependent with DialogEndState)
Set the number that the player chooses.
- 0 = listen on ESC.
- 1 = First Option the player selects.
- 2 = Second Option the player selects and so on.
DialogOption Value
If Check = DialogOption it triggers, when the Player choose a specific Option from the Dialogues.ecf. You set the Option number in the Value field below.
- 0 = listen on ESC.
- 1 = First Option the player selects.
- 2 = Second Option the player selects and so on.
TriggerDistance
Set the distance in meter when the event should fire. Usable in combination with NearUnit, NearPoi, NearResource.
VisibleOnStartPlayfields
The name of the playfield like it is added in sectors.yaml, not the folder of the playfield.yaml file! If playfield Name has spaces, just write it with spaces (no brackets needed).
VisibleOnStartPlayfieldTypes
Use the name of the playfield ads defined IN a playfield.yaml (This is NOT the folder name!)!
GuidingDistance
Distance in meter when the yellow waypoint should be visible in the HUD. Use -1 for infinite
RewardedChapters
Needs to be used with Visiblity: WhenRewarded. Set the Chapter you want to reward to players.
RewardedTasks
Display format: ChapterName;TaskName.
Needs to be used with Visiblity: WhenRewarded. Set the Chapter you want to reward to players.
Or for Tasks use the Property "OnlyVisibleWhenRewarded".
TriggerCondition
- supported comparison-operators: <, <=, >, >=, ==, !=.
- Example: < 500
Item
After you chose an item icon you can press ESC to get it updated in the main view.
If item icons are missing they get eventually in when I find the time.
ActivateChapterOnCompletion
Can only start ONE chapter.
AutoActivateOnGameStart
If set to true this chapter will automatically activates itself (if VisibleOnStartPlayfields is set correctly for example).
RepeatConditions
If set to 0 the chapter can be repeated infinite times.
- NumRepeats: 0 (infinite times). 1 (only once). > 1 (fixed repeatable amount)
- Delay: Number in minutes (when the mission activates again. Only available if NumRepeat is 0 or greater than 1)
- DelaySeconds: Number in seconds (when the mission activates again. Only available if NumRepeat is 0
or
greater than 1).
Note: When DelaySeconds is greater than 0, Delay will be ignored. - DelayAdd: Number in minutes (add those minutes after each successful completed NumRepeat on top of the Delay)
- NoReminder: When true, there won't popup "This mission is playable again" message anymore. Default is false.
CompletedMessage
Shows the player a text if this chapter/task/action is completed.
PDA Referral
Makes a chapter on a certain playfield visible that has the string in its playfield.yaml.
Additional Info
Requires entry 'PdaReferral:' in the playfield.yaml or playfield_static.yaml where the PDA command should work for; Can also be several strings.
Chapter Activation
If it is set, it activates a chapter when certain conditions (Checks like in Actions) are met.
You can have multiple ChapterActivation items but make sure to NOT have the same NearUnit name for all items.
Types Meta
A custom eWPDA Tag which translates just into Types in the PDA.yaml.
Note: Do NOT use multiple Types in combination with InventoryContainsCountofItem! Only 1 works.
Chapter Activation > ActivationMessageType
One of:
- None - No message, only activates/displays
- Info - Shows only NotifyMessage text for MessageTime seconds
- MessageBox - Displays NotifyMessage text in message box with Accept/Decline buttons
- Auto - Automatically deactivates any current mission and activates this mission immediately. Displays a confirmation message box
Default is Info
..PlayfieldOps > StructPower
Switch the Power of the structure on or off.
..PlayfieldOps > StructureName
Possible entires:
- 'local' (is the structure where the player stands or looks at)
- The Structure Spawn name like you see it in the game.
- The Group Name the structure is in.
ReputationLevel
General Reputation Level values:
- 0-6000 = Hostile
- 6001-12000 = Unfriendly
- 12001-18000 = Neutral
- 18001-24000 = Friendly
- 24001-30000 = Honored
Check
Action Checks are the most important thing in the PDA but also the most complex one.
BlockDestroyed
- Works with building blocks and devices
- Works with terrain-placeables
- You need to use the actual SUB-GROUP or VARIANT name (Key)
- Does now work with custom device names (you need to use the loca key)
BlocksPlaced
- Works with building blocks and devices placed on existing structures
- Works with placing terrain-placeables, except structure-starters.
- Works with ""Amount: "" and ""Required: ""
- If you want to track placing a new structure, use StructureSpawned instead!
- You need to use Variant-Key; See tab ""Special Notes"" for more info!
- Use BP Name (Does not work with BP Group Name or BP Spawn Name)
- Does now work with custom device names (you need to use the loca key)
BlocksRemoved
- Works with building blocks and devices placed on existing structures
- Works with placing terrain-placeables, except structure-starters.
- Works with ""Amount: "" and ""Required: ""
- If you want to track placing a new structure, use StructureSpawned instead!
- You need to use Variant-Key; See tab ""Special Notes"" for more info!
- Use BP Name (Does not work with BP Group Name or BP Spawn Name)
- Does now work with custom device names (you need to use the loca key)
DayNightChange
- use "Names" parameter to specify "Sunset" OR "Sunrise".
- example: Names: [ Sunset ].
StarClassEntered
- Similar to PlayfieldEntered you can define as first Names parameter which StarClass (taken from the GalaxyConfig.ecf) should be used, for example "BH".
- (Optional) Second Names parameter would check in which PlayfieldType the player is, for example "Space".
- Note: WarpTargetPlayfields must be set to PlanetType: SunOrbit
PlayerLevelUp
- use "Value" parameter to specify the level the player has to reach so that the Action gets completed.
- example: Value: 5
PlayerStatChanged
- use "Names" parameter to specify an expression in the form "stat-name comparison-operator compare-value".
- the action gets completed when the respective stat value changes from a "condition not satisfied" value to a "condition satisfied" value.
- this prevents the action from insta-completing if at the moment the Check becomes active the value is already "condition satisfied".
- example: Names: [ Food < 100 ]
- as soon as the player's Food value decreases from 100 or above (condition not satisfied) to below 100 (condition satisfied) the Action gets completed.
- supported stat-names: Health, Food, Oxygen (1), ArmorO2 (2), Radiation, Temperature (3).
- (1) this is the player's personal little oxygen reserve to not immediately have the "No Oxygen" alarm when, e.g. going under water.
- (2) this is the oxygen in the armor suit the player has equipped (as displayed in the life stats UI).
- (3) this is the player's body temperature.
- supported comparison-operators: <, <=, >, >=, ==, !=.
PlayfieldEntered/Left / PlayfieldTypeEntered/TypeLeft
- triggeres when playfield name / type is entered / left.
- respectively specify the playfield name or the playfield type name (from "PlanetType" in playfield yaml).
- example for PlayfieldTypeLeft: Names: [ Temperate ].
StatusEffectApplied / StatusEffectRemoved
- triggeres when given Status Effect is applied or removed (taken from the StatusEffects.ecf).
- example: Names: [ MedikitApplied ].
BiomeChanged
- Use the "Names" string array to specify the biome name the player just left and / or the one he just entered.. Examples:
// test for biome left
Check: BiomeChanged
Names: [ OldBiomeName, "" ] // the 2nd empty string is optional and just for better readability
// test for biome entered
Check: BiomeChanged
Names: [ "", NewBiomeName ]
// test for biome transition (= player transits a biome border in the correct direction)
Check: BiomeChanged
Names: [ OldBiomeName, NewBiomeName ]
eWPDA notice: as you can see, max. 2 names can/should/must be set for BiomeChanged!
eWPDA notice: to export an empty biome hit the spacebar and press enter!
InventoryOpenedPoi / InventoryClosedPoi
- both are setup the same way, in the Action set the "Names" array as follows:
- Names: [ "block-name", "poi-name", "faction-name" ] Notes: poi-name and faction name are optional - if they should not be evaluated, set them to an empty string "" (trailing empty strings can be omitted) Examples:
- Names: [ "My Favorite" ] Check completed when player opens a container or device named "My Favorite"
- Names: [ "ConstructorT2", "Crazy Base" ] Check completed when player opens any Advanced Constructor in a POI named "Crazy Base"
- Names: [ "ConstructorT2", "", "Zirax" ] Check completed when player opens any Advanced Constructor in any POI that belongs to the "Zirax" faction
- Names: [ "My Constructor", "Crazy Base", "Zirax" ] Check completed when player opens the constructor named "My Constructor" in a POI named "Crazy Base" that belongs to the "Zirax" faction
InventoryContains
- Names: [ list of entity-or-block-name ] // special entity name "Player": check player's backpack
- Types: [ list of type-name ]
- Required: NeedOne | NeedAll
- When will the check be completed? If the container/backpack of one of the given entity-or-block-name ("NamesRequired: NeedAll" is ignored) has any number of one/all of the given type-name (depending on 'Required').
InventoryContainsCountOfItem
- Names: [ "Player" ] // currently only "Player" can be used: checks player's backpack + toolbar
- Types: [ type-name ]
- Amount: amount
- Required: NeedOne | NeedAll
- When is the check completed? If the backpack + toolbar of the player has at least the amount of one/all of the given type-name (depending on 'Required').
More Checks coming soon...
Action > Names
Names are mostly used for letting the game now what entity or object the check is about.
Note: Space POIs need the spawn name set in Names, NOT the Group name. For example together BlockDestroyed. Keep Names empty for a generic Type check and rather ask in previous Actions if the player is NearPoi. Note: if you use the Check "StarClassEntered" check the documentation for proper use of Names!HasUniqueItems
Only useful in combination with the PlayerOps "InventoryOp". If set to true, the game is doing interal checks what item the player has in his inventory to be able to handle the PlayerOps "InventoryOp" properly.
Task Title
Important eWPDA Notice: ⚠️Do NOT use the same CSV Key for a Tasktitle within the same Chapter!
Chapter > StartMessage
Choose the style and format of your Start Message for Chapters. Similar behavior like for other Flex Messages (e.g. CompletedMessage).
Keep in mind some combinations:
- None: makes your Chapter a complete silence start without any text.
- If you put any Text in Message and choose Center Middle Prompt as Display type, it will show that Message in the big Briefing window as "Description" (IF you have set a Preamble) but keeps the Description you set in the Description Field in the F1 PDA window.
EndData
If you create a Scenario with a definitive end you can show the player as last action an end screen with a custom image, predefined music and custom text. ONLY works if you fill all 3 fields with data!
SignalName
Since the signal communicates with the PDA it must have a * (asterix) in front ingame (not in eWPDA). For example *AAA
eWPDA Comment
This is just a comment field for your eWPDA, in case you want to comment on certain chapters / tasks / actions. It will be exported to the PDA.yaml but has no impact ingame.
TroopTransport (TT) > Troop Spawn Count
How many troops should the TT holds / spawn on the ground?
TroopTransport (TT) > Attack Target Name
Can be player or the name of a POI / Blueprint it should attack
TroopTransport (TT) > Troop Spawn
Choose what the Troop Transporter should spawn. E.g. ZiraxMinigun. Import/Check your EClassConfig.ecf
TroopTransport (TT) > Spawn
Choose what Troop Transporter should be spawned. Import/Check your EClassConfig.ecf
OPV (Orbital Patrol Vessel) > DifficultyLevel
Note: optional opv-level is not specified which results in the default of 1 being used
OPV (Orbital Patrol Vessel) > Attack Target Name
Can be player or the name of a POI / Blueprint it should attack
OPV (Orbital Patrol Vessel) > Spawn
Choose what OPV should be spawned. Import/Check your Blueprints in Prefabs folder
TT (Troop Transport) > Behavior
currently only "AttackTarget"
OPV (Orbital Patrol Vessel) > Behavior
allowed: "HoldPosition" or "AttackTarget"
EndData > Message
TEMPORARY: this is the ONLY message field, that allows TextMeshPro format. Check the documentation about it in your LCD Screen. Example italic.
EndData > Image
Put your endscreen image to your Scenario root path and reference it here. Example: preview.jpg
EndData > Music
Choose one of the following (path + name)
Ambients\am_AlienForest
Ambients\am_AlienSavanna
Ambients\am_ArcticForest
Ambients\am_ArcticForest_Night
Ambients\am_ArcticHighPlains
Ambients\am_ArcticIntermediatePlains
Ambients\am_ArcticLowPlains
Ambients\am_BarrenFog
Ambients\am_BarrenOpenPlains
Ambients\am_BreathingUnderwater
Ambients\am_DesertCricket
Ambients\am_DesertHighPlains
Ambients\am_DesertHighPlains_Night
Ambients\am_DesertLowPlains
Ambients\am_DesertLowPlains_Night
Ambients\am_Islands
Ambients\am_Lava
Ambients\am_LavaFog
Ambients\am_LavaPlains
Ambients\am_Mountains
Ambients\am_Oasis
Ambients\am_Oasis_Night
Ambients\am_Ocean
Ambients\am_OpenPlains
Ambients\am_OpenPlains_Night
Ambients\am_SmallLake
Ambients\am_Swamp
Ambients\am_Swamp2
Ambients\am_TropicalForest
Ambients\am_TropicalForest_Night
Ambients\am_TropicalIsland
Ambients\am_TropicalIsland_Night
Ambients\am_Water
Biomes\bm_2473
Biomes\bm_Adrift
Biomes\bm_alien
Biomes\bm_alien2
Biomes\bm_AlteredPhase
Biomes\bm_AnAridPlace
Biomes\bm_Anomalous
Biomes\bm_Apogee
Biomes\bm_Artefact
Biomes\bm_barren
Biomes\bm_BarrenMoon
Biomes\bm_Blight
Biomes\bm_ColdDivide
Biomes\bm_ColdSpace
Biomes\bm_Cypher
Biomes\bm_DarkSoundscape
Biomes\bm_DarkSoundscape2
Biomes\bm_DarkSoundscape3
Biomes\bm_default
Biomes\bm_desert
Biomes\bm_desert2
Biomes\bm_Diaspora
Biomes\bm_DistantWorlds
Biomes\bm_Dusk
Biomes\bm_Eden
Biomes\bm_Encryptor
Biomes\bm_EnergyMatrix
Biomes\bm_EvilWhispering
Biomes\bm_ExtraktTechno
Biomes\bm_FarEntropy
Biomes\bm_FirstHours
Biomes\bm_Fragments
Biomes\bm_Ghost
Biomes\bm_Goliath
Biomes\bm_Helios
Biomes\bm_Hyperion
Biomes\bm_JumpingTheRift
Biomes\bm_JungleDepths
Biomes\bm_lava
Biomes\bm_lava2
Biomes\bm_Magnitude
Biomes\bm_Migration
Biomes\bm_moonstone
Biomes\bm_MorningLight
Biomes\bm_Mute
Biomes\bm_NebularClouds
Biomes\bm_Obelisk
Biomes\bm_Orbiting
Biomes\bm_Praxis
Biomes\bm_Reaver
Biomes\bm_Resurgence
Biomes\bm_RiseOfTheTitan
Biomes\bm_Sanctuary
Biomes\bm_snow
Biomes\bm_space
Biomes\bm_StellarGrasp
Biomes\bm_SunnySkies
Biomes\bm_temperate
Biomes\bm_temperate2
Biomes\bm_temperate3
Biomes\bm_Tempest
Biomes\bm_TidalLock
Biomes\bm_Transit
Biomes\bm_Vanguard
Biomes\bm_Voyage
Biomes\bm_WhatWalksBelow
PlayerOps
Activate, Deactivate and Complete are your choice. However note, that OnActivate and OnDeactivate can be triggered by players at any time. That could lead to some exploits in certain circumstances.
Type: InventoryOp
This is a powerful option to implement typical missions like "find me something and bring it back to me". With InventoryOp you can give players items and take away items from them, based on criteria you set.
- Item: what item should the player get / taken away from
- Count: how much items should be given / removed. Positive number for give. Negative number for remove
- MaxInventoryCount: only useful if you give players items. It makes sure they don't get more than you have defined. Note: if you leave it to 0 the game does not give items to the player at all! Example: player has 2 Fusion Cells and you give them 2 as reward but have set "MaxInventoryCount" to 3, the player only gets +1 Fusion Cell.
PlayfieldOps
Activate, Deactivate and Complete are your choice. However note, that OnActivate and OnDeactivate can be triggered by players at any time. That could lead to some exploits in certain circumstances.
Type: DevicePowerMulti or DeviceUnlockMulti
- does not work with LOCAL
- Will go through ALL POIS with the given name and then switch ALL DEVICES with the given name.
- DO NOT OVERUSE (e.g for a whole planet) as this leads to high performance cost!
- LOCK/UNLOCK/ACTIVATE/DEACTIVATE only works reliably with POI that are loaded (not unloaded via DSL)
PDA Data Ops
- ChapterData: On Complete you can change the Visibility or Activatable state of another chapter. Optionally you can reset the given Chapter.
- DeactivateCurrentChapter: With this PDA operation you can deactivate the currently active chapter, the behavior is like clicking on the "Deactivate" button in PDA menu plus the option (if the chapter to deactivate was a "sub chapter") to continue the previously interrupted "main chapter". "norm" just deactivates, "cont" deactivates and continues previously interrupted chapter.
Required
Use this for Checks that require Types.
- NeedOne - for example if you want that the player have to pick up Ores, set amount 10, then only one Ore is already triggering the Check
- NeedAll - above example would mean the player need to pick up the full 10 Ores.
Examples
- Types: [ list of item-name ] Required: NeedOne > Check completed when: at least one of the items in the list fulfills the Check
- Types: [ list of item-name ] Required: NeedAll > Check completed when: all of the items in the list fulfill the Check
- Types: [ list of item-name ] Required: NeedOne Amount: n > Check completed when: n units of at least one of the items in the list fulfill the Check
- Types: [ list of item-name ] Amount: n > Check completed when: n units of each of the items in the list fulfill the Check
NamesRequired
Use this for Checks that require Names.
- NeedOne - for example if you want that the player have to pick up Ores, set amount 10, then only one Ore is already triggering the Check
- NeedAll - above example would mean the player need to pick up the full 10 Ores.
Do NOT use it, if there is only Name available anyways.
Examples
- Types: [ list of item-name ] Required: NeedOne > Check completed when: at least one of the items in the list fulfills the Check
- Types: [ list of item-name ] Required: NeedAll > Check completed when: all of the items in the list fulfill the Check
- Types: [ list of item-name ] Required: NeedOne Amount: n > Check completed when: n units of at least one of the items in the list fulfill the Check
- Types: [ list of item-name ] Amount: n > Check completed when: n units of each of the items in the list fulfill the Check
NeedAllTypes
Basically the same as Required and NamesRequired in Actions but simplified to a boolean => true or false.
- false - for example if you want that the player have to pick up Ores, set amount 10, then only one Ore is already triggering the Check
- true - above example would mean the player need to pick up the full 10 Ores.
NeedAllNames
Basically the same as Required and NamesRequired in Actions but simplified to a boolean => true or false.
- false - for example if you want that the player have to pick up Ores, set amount 10, then only one Ore is already triggering the Check
- true - above example would mean the player need to pick up the full 10 Ores.
RequiredInventory
If set, this works as a pre-condition for the main Check. It basically saves you to add an action where you ask the player if he contains a certain item.
WARNING: Do NOT use RequiredInventory together with the Required or NamesRequired property!Guiding
- Waypoint - default used in ChapterActivation. The waypoint stays visible until ChapterActivation triggers.
- WaypointDiscard - default used in Actions. On approach the Waypoint will be removed.
- Destination - not used anymore
- TempIndoor - not used anymore
Val
Used for example in PlayerOps > Type > Boost. It allows numbers.
NOTE: if used for PlayerOps > Status > SpeedMod, the number range is between 0 and 1 (float). Radiation is also a float. NOTE: Boost > ALL only accepts Remove.Action > IsOptional
- when setting the Action parameter "IsOptional: true" that action is not required to be completed to
complete the task
- preferably, optional actions should be put at the bottom of the task's actions
- UI: optional actions will be displayed with square brackets, e.g. "[Example Optional Action]"
Action > IsOrdered
- when setting the Action parameter "IsOrdered: true" that action is configured as "ordered"
- all ordered actions within a task need to be completed top -> down (like the tasks of a
chapter)
- preferably, ordered actions should also be put at the bottom of the task's actions - but before
optional actions (if a task uses both types)
- UI:
- ordered actions are displayed with a "> " prefix
- in PDA HUD (at right side of game screen) only those actions are displayed that can currently be
completed or are already completed
- in PDA window (F1) all actions are displayed to see (as before) what steps a task consists of
PDA Image Gallery
For Descriptions: click first in the Description text area and then on an image here in the gallery to insert it automatically.
For PDA Image: click on an image to copy it to your clipboard and CTRL + V in the Image Name field to insert it.
eWPDA - Donation
Hey Creators!
Thanks for using my tool - I hope it helps you as much as it helps me, creating great content for
Empyrion.
This tool is online since 2+ years, 24/7 and helped not only my HWS Servers but also Project/Reforged
Eden and even Eleon themselves for creating Vanilla content.
I think it's safe to say that creating PDA content without eWPDA is like trying to chop a tree with a
knife.
However, while it's free and easy for you to use, it's quite a challenge for me to maintain it, support
it and implementing whatever new feature might come.
This is where you come into play. To keep eWPDA public and free for everyone, I would ask for a donation
from time to time to at least cover the web server costs this tool is running at.
But to make it even more lucrative for you, I came up with a pledge system. You can either send me a
feature request or I come up with features from time to time that could improve the tool. Once the
pledge goal is reached the feature will go live!
Thanks in advance and enjoy eWPDA.
If there is no pledge option available or you just want to support this way
eWPDA Pledge Options
Import / Export of Chapters
Do you ever wanted to import/export a specific chapter from another Scenario to yours? The workflow
is
quite a
challenge and fiddling around with the PDA.yaml and PDA.csv files. With this big feature, it's 4
button
clicks.
Bonus: Better sidebar scroll behavior with sticky categories that stay on top while
you
scroll.
It took me 10 hours to implement and test.
300€ raised! ✅ Implemented
Goal: 300€
PDA Description Image Chooser / Gallery
With Empyrion Patch 1.7.5 you can insert PDA images to Descriptions. Instead of typing in the
Description {image.jpg} (thus grabbing the image name from somewhere somehow), I can implement a
feature, to preview all currently uploaded PDA images and choose from it. Once clicked, it is
automatically injected in your Description text field, where your cursor is. You can use this
feature also as a gallery, to see what PDA images you have imported already.
Bonus: You can use the Gallery also for the PDA CustomImage and the design got
streamlined and is much cleaner.
It took me 3 hours to implement and test.
90€ raised! ✅ Implemented
Goal: 90€
Clear only the PDA Image database
Did you upload some PDA images by accident or some are not needed anymore? For your convenience I
can add a dedicated Clear PDA Image database button, so you don't have to reimport your whole
Scenario - saving time in the long run.
It took me 10 minutes to implement and test.
5€ raised! ✅ Implemented
Goal: 5€
Copy / Paste Objects

Did you ever have the case to copy paste just Rewards from one Chapter to another? Or
ChapterActivations? I bet!
New: You can now not only copy/paste all objects (green plus) but have also an
additive
paste option when holding CTRL on paste.
It took me 5 hours to implement and test.
150€ raised! ✅ Implemented
Goal: 150€
Copy Task yaml key
Extension of the IsPdaChapterActive CTRL + ALT + D shortcut. If you want to use the new
IsPdaTaskActive
in Dialogues, this feature saves your time, since you don't need to search for it in the PDA.yaml.
With
1 click you get the yaml key, copied in your clipboard, so you can then just paste it in eWCCT.
It took me 2 minutes to implement and test.
1€ raised! ✅ Implemented
Goal: 1€
Text Editor Buttons facelift
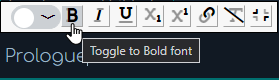
Do you want nicer buttons for the Text Editor? I can do this easy but the money would help me a lot
to
keep all those icons alive. See here:
Icons cost money too.
It took me 10 minutes to implement and test.
5€ raised! ✅ Implemented
Goal: 5€
Better URL handling
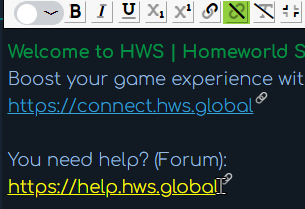
URLs are handy, since they open in the steam web browser overlay, once a player clicks on them. In
eWPDA
they are sometimes hard to detect. With this pledge it's easier since you got an url icon and color
feedback on hover! Also I found out that there is no "URL Unlink" button available. Instead of
removing
it in the PDA.csv by hand, you can do it now with 1 click. Just select your link text and click on
the
new remove link button.
It took me 6 minutes to implement and test.
3€ raised! ✅ Implemented
Goal: 3€
Add new PDA Chapter under the current Chapter
Thanks for the request to certain users - I found it also inconvenient, so here we are. If you
select a dialogue in the left list and then just click the green Add Chapter button and then change
the name of it, it will be put under your current active chapter. That way you don't need to
duplicate chapters all the time or do filter workarounds. If you CTRL + click on the green Add
Chapter button you have still the scroll to bottom behavior if needed.
It took me 14 minutes to implement and test.
7€ raised! ✅ Implemented
Goal: 7€
Collapse / Expand Sidebar
In case you want to concentrate on your dialogue logic and don't have the sidebar in view, you can
collapse it.
It took me 30 minutes to implement and test.
8€ raised! ✅ Implemented
Goal: 8€
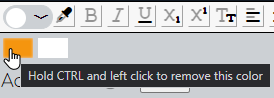
Import Color to your Palette (Colorpicker)
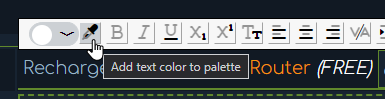
If you import a PDA csv you might find colors you want to use, because you don't have it in your own
colorpalette (or you deleted your colorpalette). To get them in, it was quite a burden.
Now, it's one click!
Bonus: you get the option to delete single colors!
It took me 3 hours to implement and test.
45€ raised! ✅ Implemented
Goal: 45€
New Release of eWPDA 2.79.0! 🎉
Hi Creators - RexXxuS here,
Thanks to a secret hero, the big Import / Export feature is now available!
Changelog
Do you like the tool? Does it help you to realize your ideas and stories?
Please consider supporting eWPDA, so I can continue updating it
eWPDA
Welcome to eWPDA - Empyrion Web PDA
Start fresh?
If you don't want to import any PDA files and start from scratch, just click on the left green + to create a new Chapter and with that a new PDA journey.
Import?
If you want to import your PDA files, go to the
Make sure to also import your BlocksConfig.ecf and ItemsConfig.ecf for proper item suggestions and more. You can basically import your whole Scenario folder and eWPDA handels the rest!
Done with all of that? Select a chapter in the left Chapter Tree. Have fun!